
Welcome Tab
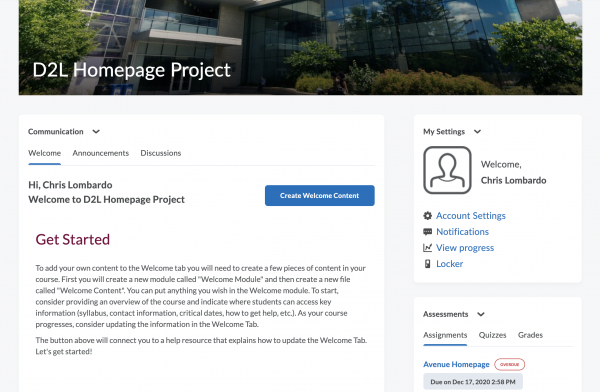
The Welcome Tab is a new addition that provides a dedicated space in the Communications Widget to share important information about the course. The Welcome Tab will automatically display a welcome message with the student name and the course title (E.g. Hi, First Name, Last Name. Welcome to English 1AA1.)
The Welcome Tab can display any information you like. This is typically a good location for key information that many students would be looking for. To start, a good practice may be to include an overview of the course, key dates and learning objectives. It could also be a good place to include a course overview and introduce how to navigate the course shell and where to find key information. To make it easier for students you can include links to other content in the course to eliminate steps and simplify the process.
Creating content for the Welcome Tab
By default the Welcome Tab will load content that exists in the backend. Note: You cannot modify the content that the system shows automatically. However, it is easy to update this to be anything you want. To create your own content for the Welcome Tab follow the following steps:
First, in your course homepage with the new Avenue Homepage activated, click on the Content Tab in the main navigation. If you do not have any content yet this section may be blank.
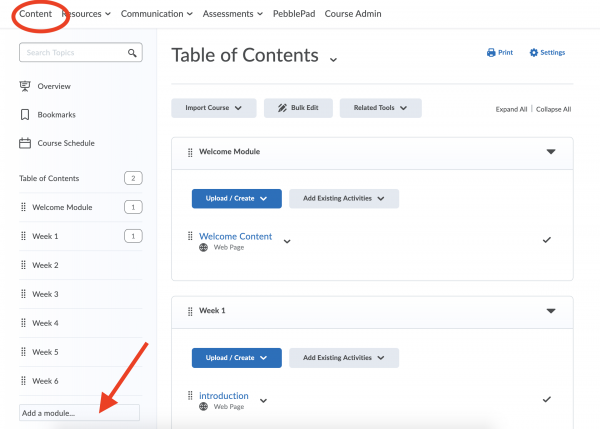
For this content to show up in the Welcome Tab you must create a module called “Welcome Module”. To do this, Click on “Add a module”. Type Welcome Module” and press Enter. The New Welcome Module should show up in the Table of Contents.
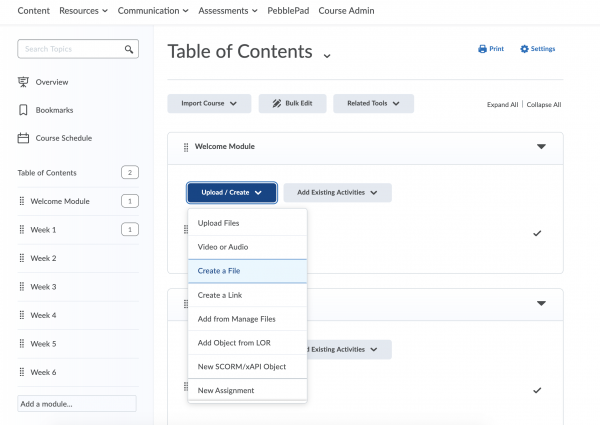
Once you have created the Welcome Module you have to create a new page. The system will automatically populate the Welcome tab with whatever information you put in the this page. To do this, click Upload/Create. Choose “Add a File”.
Once you click “Create a File you will be directed to a new page that looks like this:
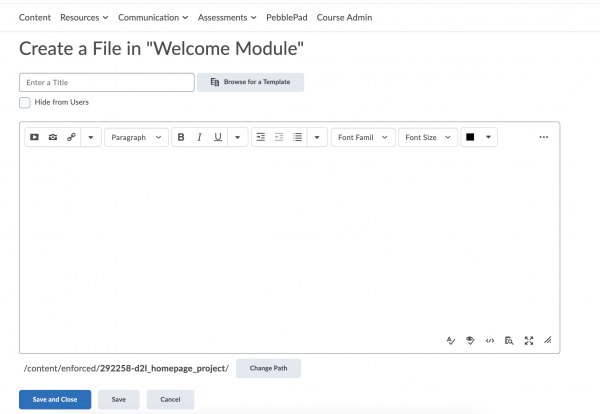
Enter a Title in the allocated box. The title must be “Welcome Content” for this to be populated in the Welcome Tab. Once you have entered the tile you can begin creating the content that will reside in the Welcome Tab. Choose “Save and Close”. This page will now show up in the Welcome Tab on the course homepage.
You have now created the Welcome Tab Content! But, it will be blank. Learn how you can create custom content in the Welcome Tab.
Please note: If you want to change what content is showing up in the Welcome Tab you must edit the content on this page. If you do not want to lose the content you have created, we recommend you rename this page and create a new “Welcome Content” page. If you change this page and save over it, the content will be replaced and cannot be retrieved.
Getting Help
Using the widgets? Share your feedback and let us know what is working or suggestions for improvements.
Need help? The New Widgets landing page provides information about and how to use the new widgets. If you still need help, Request support.