
Assignments
Vendor Documentation
Assignment tool from a Student’s perspective:
https://community.d2l.com/brightspace/kb/articles/18102-assignments
Assignment tool from an Instructor’s perspective:
https://community.d2l.com/brightspace/kb/articles/3304-about-assignments
Setting up an Assignment folder in Avenue:
https://community.d2l.com/brightspace/kb/articles/3608-create-an-assignment
Add feedback and evaluations to Assignments submissions:
Access the new Assignment page from the Content tool
There are several different starting points to create assignments.
To create an assignment in the Classic Content Experience
- In Content, select the module where you want to create an assignment.
- Click Upload/Create.
- Click New Assignment.

Figure: The New Assignment option on the Upload/Create menu.
To create an assignment from the Assignments tool
- Navigate to Assignments.
- Click New Assignment.
Fill in assignment details
When creating a new assignment, start by entering basic details such as name, grade scheme, due date, and description.
To fill in assignment details
- From the New Assignment page, enter a Name for the assignment.
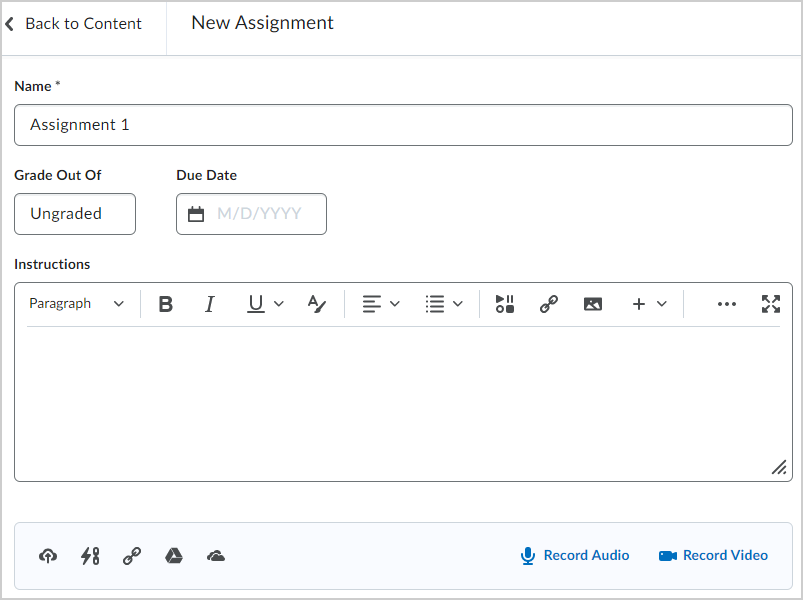
Figure: The New Assignment page. - For Grade Out Of, enter the number of points for the assignment.
- Select whether the assignment will be in the Grade Book by clicking the drop-down menu.
- Enter the Due Date for your assignment.
- Enter a Description for your assignment.
Note: You can click the icons to upload any files, link to any existing activities or external weblinks, attach any files from Google Drive or OneDrive, and record and/or upload any audio or video files. - If you do not wish to configure your assignment further, toggle the assignment to Visible and click Save and Close.
The new assignment is created and available to learners.
Set a start and end date for your assignment
You can further customize your assignment by setting availability dates.
To set a start date and end date
- From the New Assignment page, expand the Availability Dates & Conditions accordion.

Figure: The Availability Dates & Conditions section of the New Assignment page. - Set a Start Date and an End Date.
- If you do not wish to configure your assignment further, toggle the assignment to Visible and click Save and Close.
The new assignment is created with specified start and end dates.
Note: You can also click the link below these fields to change the default settings for availability dates and add availability dates to your Calendar. When you collapse Expand Availability Dates & Conditions, the summary text displays the selected start and end date information. The default time for an assignment Start Date is set to 12:00 AM. The default End Date time is set to 11:59 PM.
Create a new release condition for your assignment
You can add release conditions to your assignment. Release conditions are conditions that must be met for an assignment to be made visible to learners. For example, you can set your assignment to only be available to learners when they achieve a specified score on a quiz.
To create a new release condition
- From the New Assignment page, under Release Conditions, click Add Release Condition and select Create New.
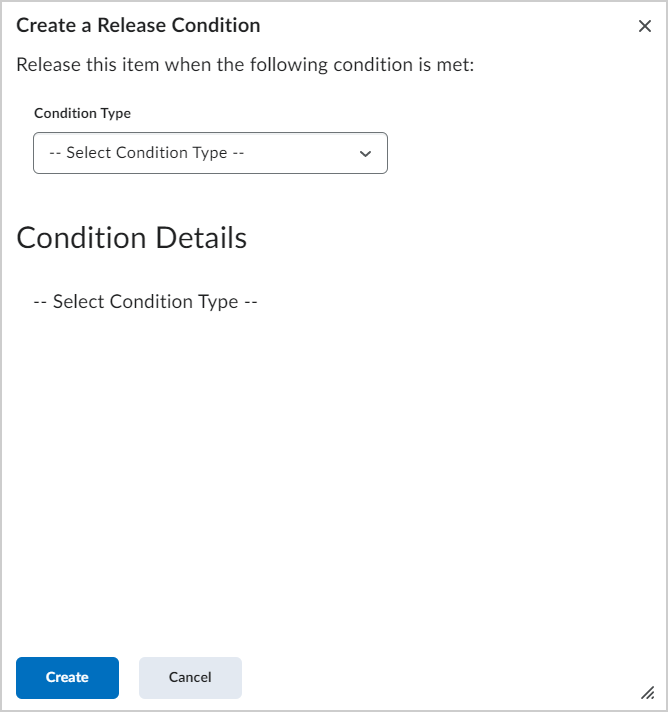
Figure: The Create a Release Condition page. - Under Condition Type, select the condition that must be met.
- Under Assignment Submission Folder, select the assignment submission folder in which this condition must be met.
- Click Create.
- If you do not wish to configure your assignment further, toggle the assignment to Visible and click Save and Close.
A new release condition is added to your assignment.
Make your assignment only available to a select group
You can Manage Special Access for your assignment. This enables you to make your assignments available only to a select group of users or to add individualized due dates for certain users.
To make your assignment available to a select group
- From the New Assignment page, expand Availability Dates & Conditions and click Manage Special Access.

Figure: The Manage Special Access page. - Select one of the following options:
- Allow users with special access to submit outside the normal availability dates for this folder.
- Allow only users with special access to see this folder.
- To add users, click Add Users to Special Access.
- Specify the Due Date and the Availability start and end dates for selected users.
- Select the checkbox alongside the users who you want to grant this special access to.
- Click Save and then click Save and Close.
- If you do not wish to configure your assignment further, toggle the assignment to Visible and click Save and Close.
Your assignment is configured to give special access to specific users or groups.
Customize Submission Type & Completion settings
You can also customize what type of assignment you are creating, and what file types you will accept from learners submitting their assignments.
To customize submission type and completion settings
- From the New Assignment page, expand Submission & Completion.
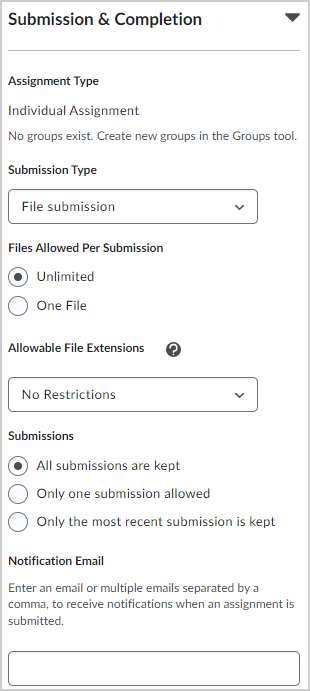
Figure: The Submission & Completion settings of a new assignment. - Customize the following options:
- For the Assignment Type, specify if this is an Individual Assignment or Group Assignment.
Note: You must have groups set up in your course to set an assignment as a group assignment. - From the Category drop-down menu, select an existing category to align your assignment to or click New category, enter a Name for your category, and click Create.
Note: You can edit the name of an existing category from the Assignments page. On the Assignments page, click Edit Categories. - Select a Submission Type:
- For File Submissions, set the number of Files Allowed Per Submission and the Submissions rules.
- For Text submissions, set the Submission rules.
- For On paper submissions, set Marked as completed to one of the available options: Manually by learners, Automatically on evaluation, or Automatically on due date.
- For Observed in person assignments, set Marked as completed to one of the available options: Manually by learners, Automatically on evaluation, or Automatically on due date.
Note: When you collapse Submission & Completion, the summary text displays your selection.
- From the Allowable File Extensions drop-down menu, select an option to restrict file extensions on submissions for the assignment.
- To receive email notifications when an assignment is submitted, under Notification Email, enter an email address or multiple email addresses separated by a comma.
Note: This field is only available when the assignment Submission Type is set to File submissions or Text submissions.
- For the Assignment Type, specify if this is an Individual Assignment or Group Assignment.
- If you do not wish to configure your assignment further, toggle the assignment to Visible and click Save and Close.
The assignment type and acceptable file type for submission is set.
Customize Evaluation & Feedback settings
You also can add rubrics, display annotations, and enable integrations such as Turnitin.
To customize evaluation & feedback settings
- From the New Assignment page, expand Evaluation & Feedback.
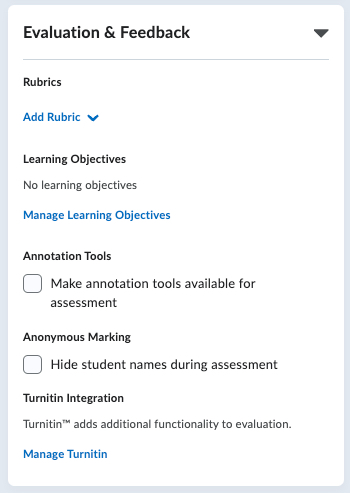
Figure: The Evaluation & Feedback section of the New Assignment page. - Customize the following options:
- Click Add rubric and either create and attach a new rubric or add an existing one.
Note: If you are attaching multiple rubrics, from the Default Scoring Rubric drop-down list select the rubric to be used by default when scoring. - To display annotation tools in the document viewer, under Annotation Tools, select the Make annotation tools available for assessment check box.
- To enable anonymous marking, under Anonymous Marking, select the Hide student names during assessment check box.
- Under Turnitin Integration, click Manage Turnitin.
- Enable the Turnitin integration and click Save.
- Click Add rubric and either create and attach a new rubric or add an existing one.
- To make your assignment visible to learners, click on the Visibility toggle.
Note: If this Visibility is not turned on when creating the assignment, the assignment is hidden from learners by default. - Click Save and Close.
Note: Manage Learning Objectives only appears when the Competencies tool is enabled and the course is not using the Learning Outcomes tool. Speak to your administrator for more information.
Add a rubric to an assignment
- On the Assignments page, click the Actions drop-down menu for the assignment where you want to add a rubric. Click Edit Assignment.
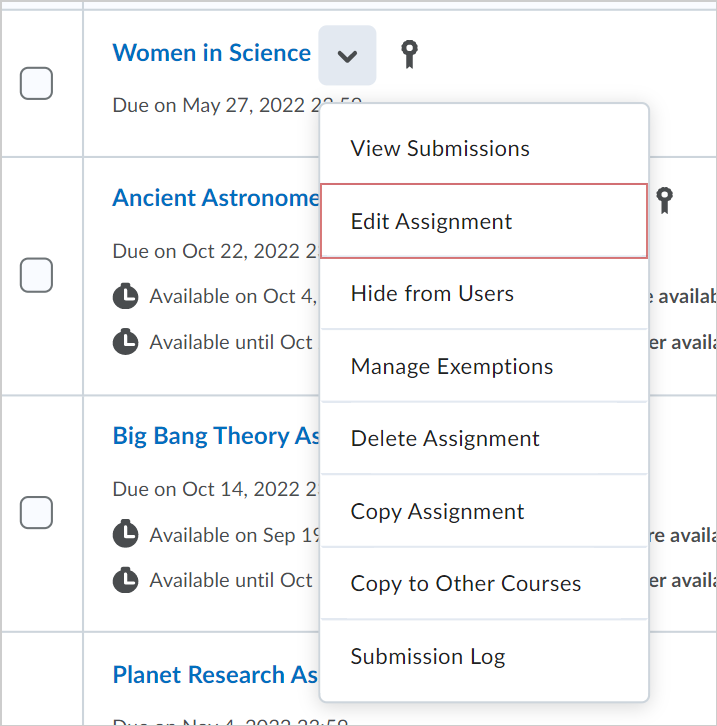
Figure: The Edit Assignment option in the Actions drop-down menu for an assignment.
- In the Evaluation & Feedback menu, Click Add Rubric > Add Existing.
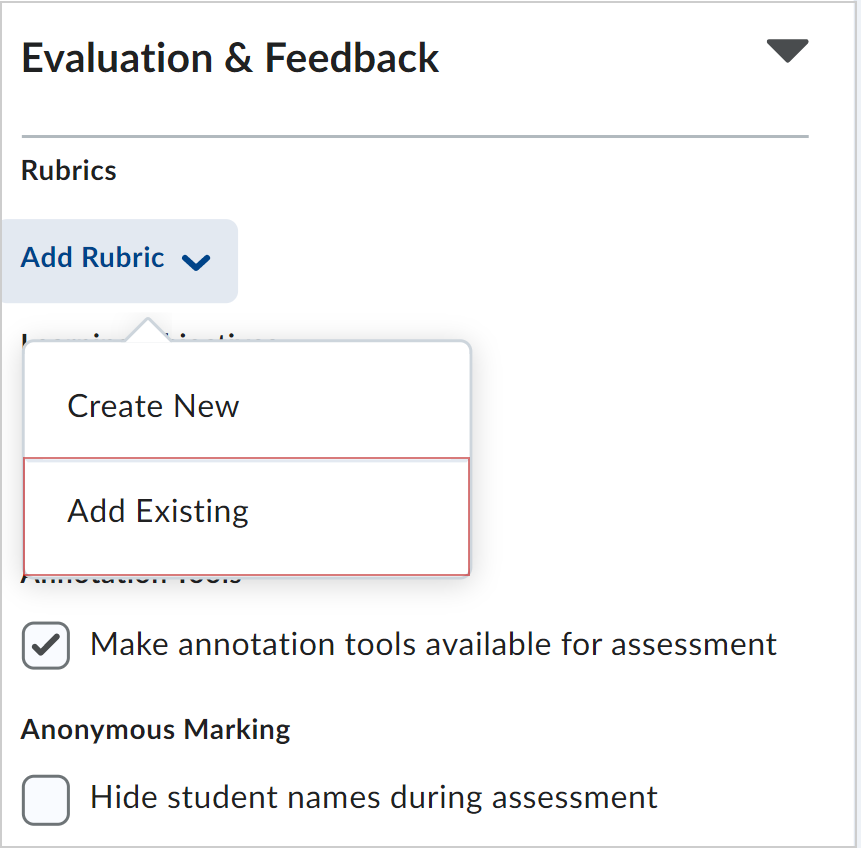
Figure: The Evaluation & Feedback menu with the Add Rubric drop-down option showing the Add Existing option.
- In the Add Existing Rubric dialog, click the checkbox for the rubric you want to add.
Note: You can add more than one rubric to an assignment.
- Click Add Selected.
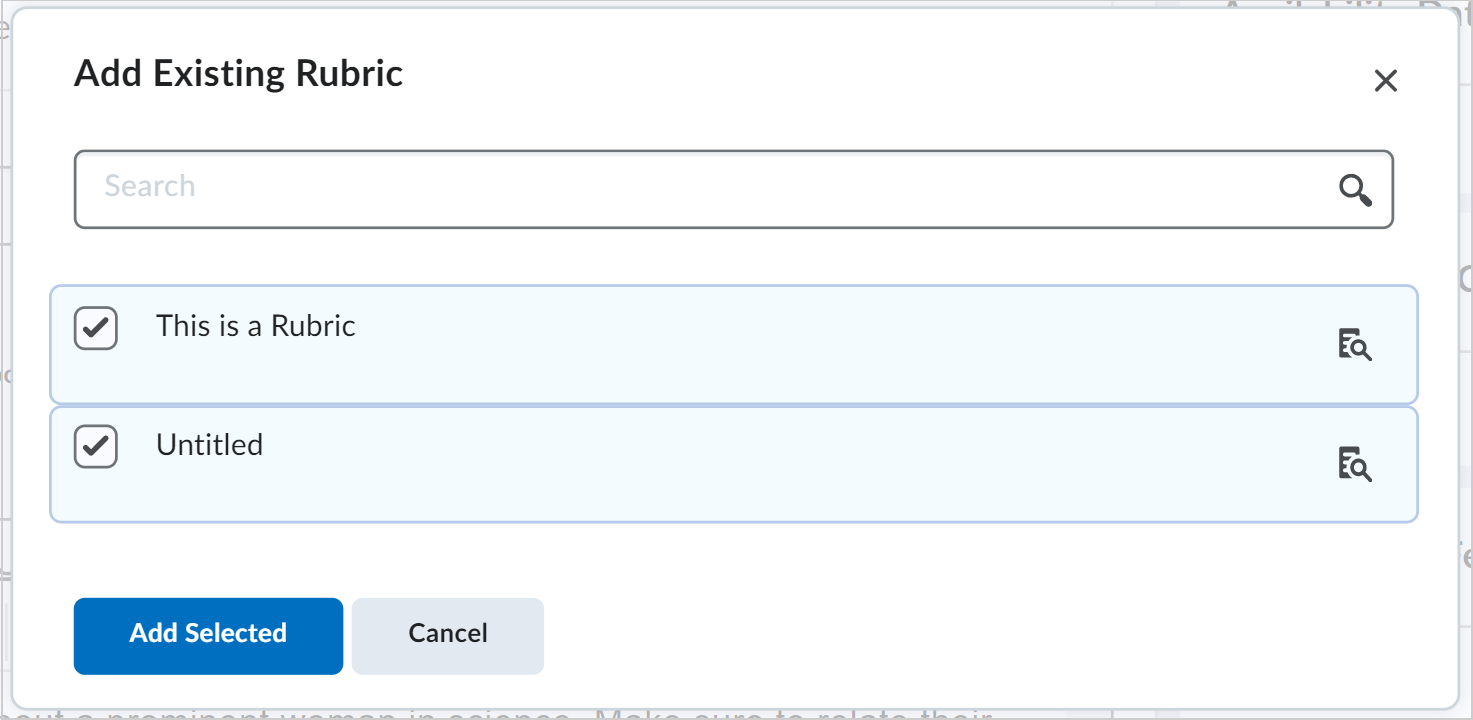
Figure: The Add Existing Rubric dialog.
To enable or disable anonymous marking:
Important: Unfortunately at this time the anonymous grading feature will only work for TA’s with the ‘TA3’ role, in a course.
We are continuing to work with the vendor (D2L) on this one, so that instructors are able to leverage this functionality.
With anonymous marking is enabled on an assignment folder, the TA role can’t publish feedback/grades, only save it as a draft. A user with the instructor role has to go in and publish it.
Enable/Disable Anonymous Marking
Anonymous marking can be enabled or disabled when creating a new assignment submission folder. Anonymous marking can be enabled on an assignment submission folder with submissions, but cannot be disabled once assignment submissions are made. Courses that use Turnitin can only enable anonymous marking for assignment submission folders before any assignment submissions are made. The d2l.Tools.System.Features.AnonymousMarking must be enabled by an administrator in order to user anonymous marking.
To enable or disable anonymous marking
- Navigate to Assignments.
- Click New Assignment.
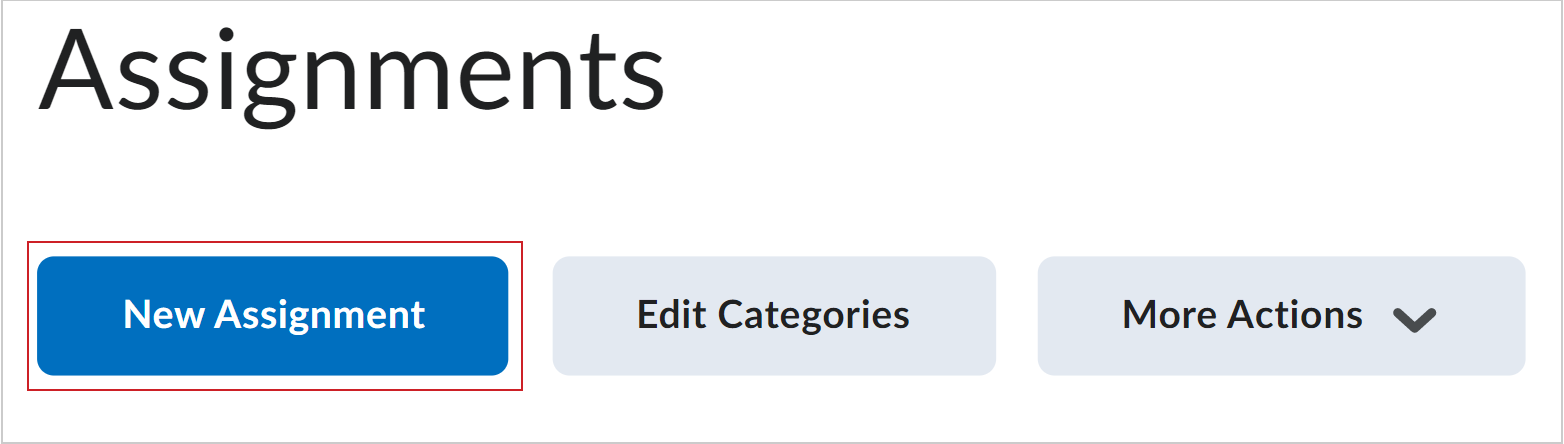
Figure: The New Assignment option on the Assignments page.
- Complete all required fields.
- In the Evaluation & Feedback accordion, under Anonymous Marking, select or deselect Hide student names during assessment.
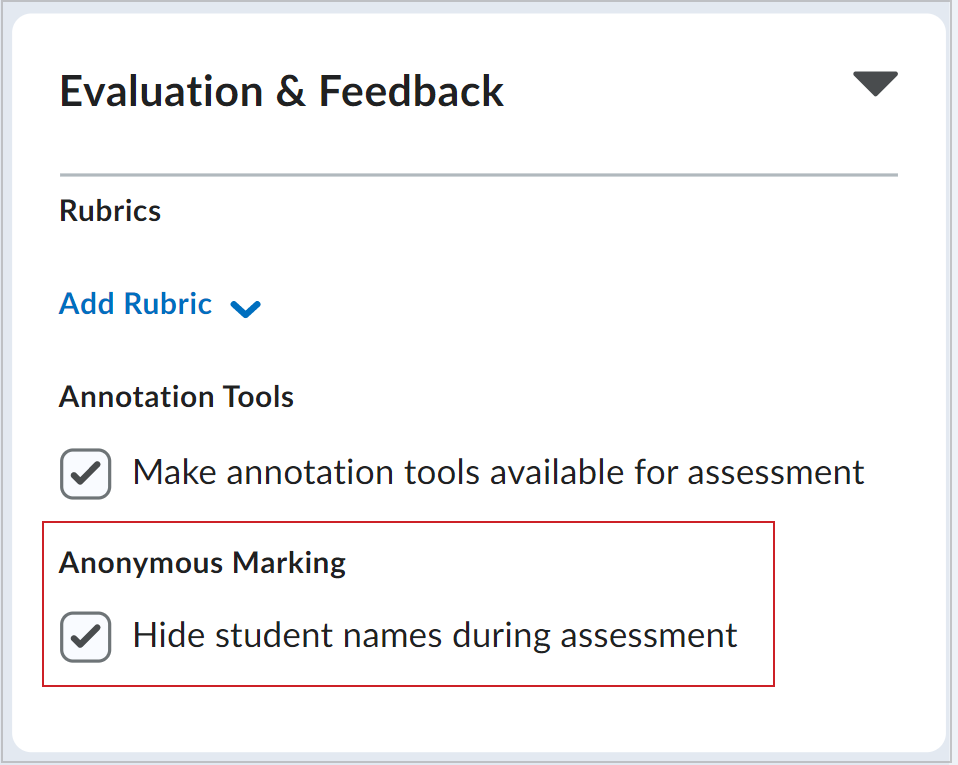
Figure: The Hide student names during assessment checkbox in the Evaluation & Feedback accordion.
- Click Save and Close.